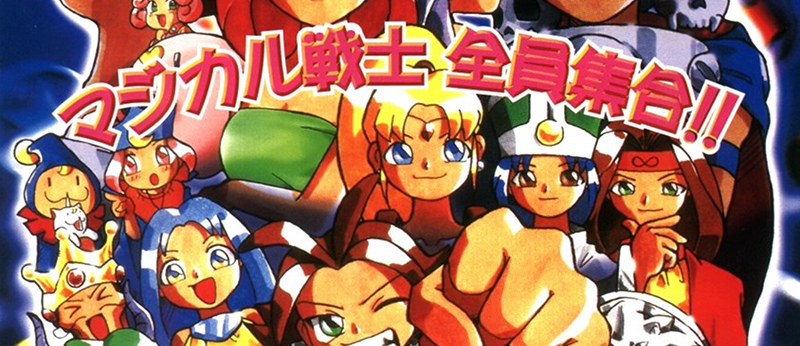
Magical Drop is a fun (and addictive) puzzle game series by the now defunct Japanese arcade veterans Data East. Personally I find the third installment (1997, on Neo Geo MVS) the ultimate version. Magical Drop F (on the PSX) was not too bad either.
I decided to make a (primitive and limited) version of the game with an Arduino: Enchanted Orbs!
Components
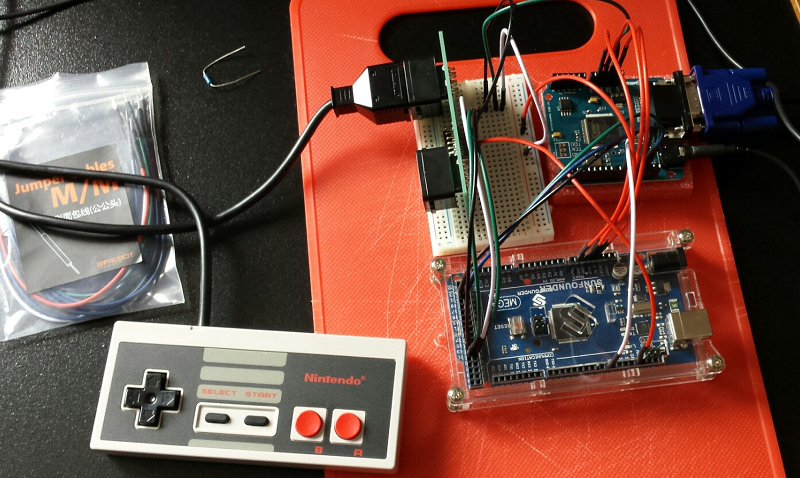
This little homebrew homage is built with the following components:
- A Gameduino 1 shield.
- VGA output (800x600, internal resolution is 400x300).
- Audio output.
- A Sprite / Tile based interface very remniscent of 8-16 bit era game console capabilities.
Although it is a couple of years old (released in 2011?), this really is an excellent shield (and very fit for purpose here). To be honest, I don’t understand why there seem to be so few games available that were built with it.
- An Arduino Mega 2560.
- Lots of storage, plenty or RAM and I/O pins.
- Lots of storage, plenty or RAM and I/O pins.
The game could very likely be ported to run on a stock UNO too, but that would require ripping out (or trimming) some of the graphics and sound data (in order for the image to fit in 32KB).
- A classic NES controller.
I plugged it into this NES Controller Breadboard adapter but that is a convenience consideration mostly. The NES controller is very easy to read out, which makes it a natural candidate for an Arduino setup.
- A breadboard and some wires.
Wiring
Wiring is straightforward. For reference purposes, here is a fritzing diagram:

In the layout above, the NES Controller is attached through breadboard pins A10-A15:
| Breadboard | NES Controller | |
|---|---|---|
| A10 | Clock | |
| A11 | Latch | |
| A12 | Data1 | |
| A13 | Data2 | (optional, unused) |
| A14 | +5V | |
| A15 | GND |
Features
Title Screen
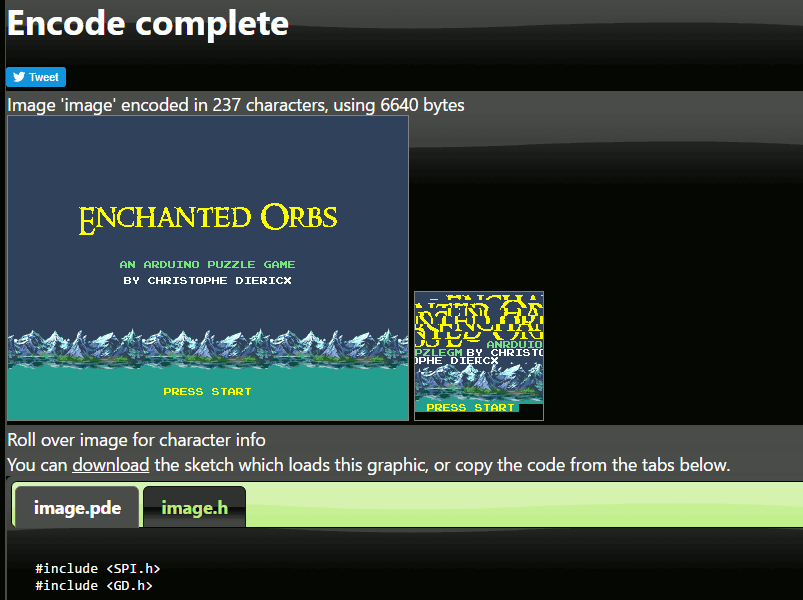
This screen is close to the Gameduino’s limits as far as displaying graphical detail (on a single background plane) is concerned: 237 out of 255 available character tiles are in use (and this required some very considerate image construction - lining up exactly with 16x16 offsets).
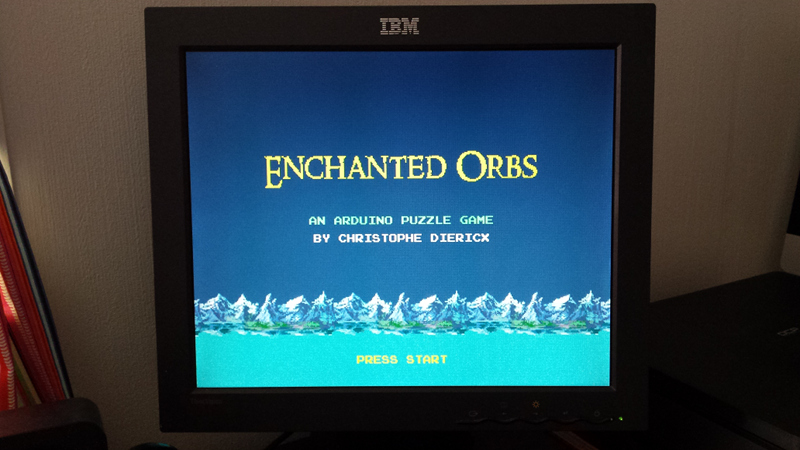
The online Gameduino tools are a great help though (in order to break up a source image into the individual tile elements that get loaded into character mapped screen RAM).
The “PRESS START” message is pulsed by (repeatedly) copying over relevant areas in character RAM. Also, with a quick script I converted a MIDI file of Franz Schubert’s “Der Erlkönig” into a representation usable by the Gameduino’s (fairly advanced) audio circuitry.
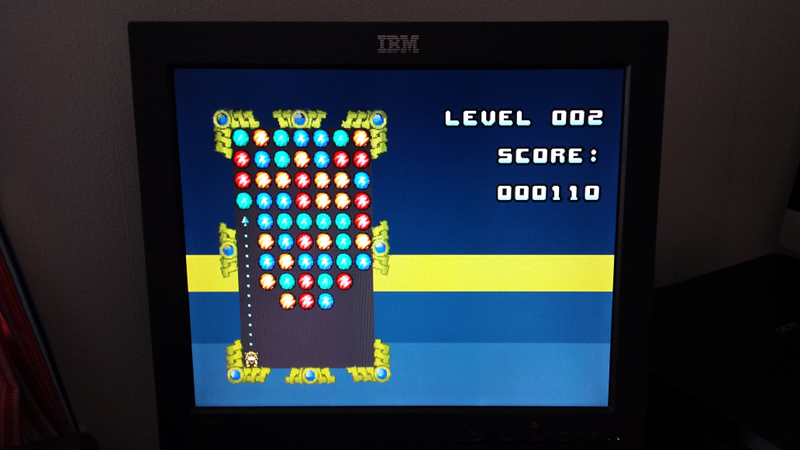
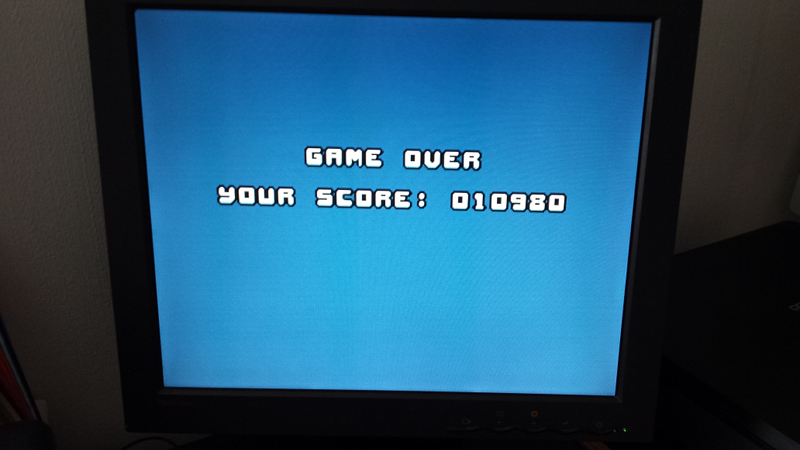
Game Screen and Game Over Screen
The main game screen is primarily sprite-driven (using only basic sprites features, really). Typical Magical Drop game rules apply (including support for chains!). There are 255 (incrementally faster) levels to be cleared. The audio is currently limited to some characteristic bleeps (produced using sawtooth sine waves).
The “game over” screen basically reuses some of the assets (e.g. character sprites) used in other screens (and is very simple). A nice addition would be storing an actual highscore table in the Arduino’s EEPROM.
The Code
Certainly unpolished in some parts (e.g. game field position iteration and calculation), but still available for everyone to enjoy on GitHub (MIT Licensed).
The project opens up in the standard Arduino IDE (version used: 1.6.11).
Font and Art Credits
I used the following fonts:
and the following art (all from opengameart.org):